Welcome to the Power Gear Leveling System Manual. This guide provides essential information for safe and effective operation of your electro-hydraulic leveling system. Always follow safety guidelines and operating instructions to ensure optimal performance and prevent potential hazards.
1.1 Overview of the Power Gear Leveling System
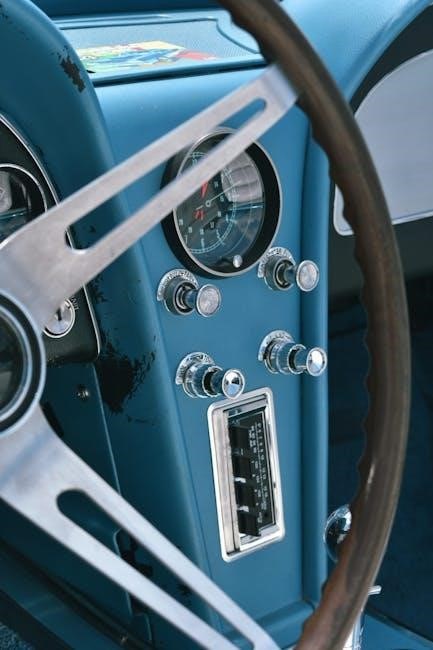
The Power Gear Leveling System is an advanced electro-hydraulic solution designed to stabilize and level recreational vehicles. It features a control box, touchpad, hydraulic jacks, and fluid reservoir. The system offers automatic and manual leveling modes, ensuring stability and ease of use. With state-of-the-art technology, it provides years of reliable operation, enhancing safety and comfort for RV owners. Always refer to the manual for proper usage and maintenance.
1.2 Importance of Reading the Manual
Reading the Power Gear Leveling System manual is crucial for safe and efficient operation. It provides detailed instructions, safety precautions, and troubleshooting tips to ensure optimal performance. Proper understanding of the system prevents accidents, extends lifespan, and helps diagnose issues early. Always study the manual before operating the system to avoid misuse and potential hazards. Familiarize yourself with key components, operating modes, and maintenance requirements for a secure and enjoyable experience.
System Components and Description
The Power Gear Leveling System includes a control box, touch pad, hydraulic jacks, electric pump, solenoid valves, and fluid reservoir. These components work together to stabilize and level your RV efficiently.
2.1 Major Components of the Electro-Hydraulic Leveling System
The system comprises a control box, touch pad, electric pump, hydraulic fluid reservoir, solenoid valves, and hydraulic jacks. The control box manages operations, while the touch pad provides user input. The electric pump powers hydraulic fluid through solenoid valves to the jacks, which adjust the RV’s leveling. This integrated design ensures precise and efficient stabilization, essential for a stable camping experience.
2.2 Understanding the Control Box and Touch Pad
The control box is the central processing unit, managing all system operations. The touch pad serves as the user interface, allowing selection of automatic or manual modes. LED indicators on the touch pad provide status updates and error codes. Ensure all functions are understood before use. Always follow the manual’s guidelines for safe and proper operation, as incorrect use can lead to system malfunctions or safety hazards.

Installation and Calibration
This section provides step-by-step installation instructions and calibration procedures for the Power Gear Leveling System. Follow the manufacturer’s guidelines to ensure proper system setup and functionality.
3.1 Step-by-Step Installation Guide
Begin by preparing the necessary tools and manuals. Ensure the vehicle is on a level surface and engage the parking brake.
Mount the control box and touch pad in an accessible location, typically near the driver’s side.
Connect the solenoid valves to the hydraulic lines, ensuring proper alignment and tightness.
Install the hydraulic jacks under the vehicle frame, following the manufacturer’s specifications.
Connect the electrical wiring harness to the control box and touch pad, verifying all connections are secure.
Power on the system and perform a test cycle to ensure all components function correctly.
Refer to the calibration section for final adjustments. Always follow safety guidelines during installation.
3.2 Calibration Procedures for Optimal Performance
Turn on the system and ensure the vehicle is on a level surface.
Press and hold the “Auto” button on the touch pad until the calibration mode activates.
Use the arrow buttons to cycle through each jack, ensuring proper extension and retraction.
Once all jacks are calibrated, press “Auto” again to exit calibration mode.
Test the system by running a full leveling cycle to confirm accuracy.
Refer to the manual for additional adjustments if necessary. Proper calibration ensures precise leveling and system longevity.
Operating the Power Gear Leveling System
Press the “Auto” button for automatic leveling or use manual mode by selecting individual jacks. Ensure the surface is level and the vehicle is secure before operation.
4.1 Automatic Leveling Mode
The Automatic Leveling Mode simplifies the process by leveling your RV with the touch of a button. Press the “Auto” button on the control panel, and the system will automatically adjust the jacks to achieve a level position. Ensure the RV is on a firm, stable surface and all wheels are in contact with the ground. The system will complete the leveling process within minutes. Once done, the control panel will indicate completion. Always monitor the process to ensure safety and avoid movement during operation.
4.2 Manual Leveling Mode
In Manual Leveling Mode, you control each jack individually for precise adjustments. Use the arrow buttons on the touch pad to raise or lower specific jacks as needed. Always ensure the RV is stable and on firm ground before starting. Check the system’s operation manual for guidance on manual calibration and adjustment procedures. This mode is ideal for fine-tuning the leveling process when automatic mode doesn’t achieve the desired result. Ensure all movements are slow and deliberate to maintain safety.

Safety Precautions and Warnings
Always follow safety guidelines to avoid accidents. Never use the leveling system as a lift for tire changes or under-vehicle work. Keep people clear of the coach before and during operation. Avoid checking hydraulic fluid leaks with your hands or body parts. Ensure proper stabilization and grounding for safe system function.
5.1 General Safety Guidelines
- Always ensure the coach is on a firm, level surface before operating the leveling system.
- Never use the leveling system to support the vehicle while changing tires or working underneath it.
- Keep people and pets clear of the coach before and during operation.
- Avoid checking hydraulic fluid leaks with your hands or any body part.
- Ensure the system is properly grounded and stabilized to prevent accidents.
- Do not exceed the recommended weight capacity of the leveling system.
- Always turn off the system when not in use or before performing maintenance.
5.2 Do’s and Don’ts While Operating the System
DO: Operate the system only on a firm, level surface. Follow the manual’s calibration and operation instructions. Ensure all jacks are fully retracted before moving the vehicle. Regularly check hydraulic fluid levels and system components for wear.
DON’T: Use the system to lift the vehicle for tire changes or repairs. Overload the system beyond its weight capacity. Operate the system near open flames or sparks. Ignore error codes or warnings from the control panel. Allow unauthorized individuals to operate the system.

Troubleshooting Common Issues
- Identify error codes and LED indications for system malfunctions.
- Reset the system by pressing multiple control buttons simultaneously.
- Check hydraulic fluid levels and connections for leaks.
- Ensure jacks are functioning properly in both modes.
- Consult the manual for specific issue resolution steps.
6.1 Identifying Error Codes and LED Indications
The Power Gear leveling system uses error codes and LED lights to indicate malfunctions. Flashing lights on the control panel signal specific issues, such as manual, auto, or circuit errors. For example, simultaneous flashing of manual, auto, and diamond lights indicates error mode. The pattern of flashing lights corresponds to the affected leveler circuit. Always refer to the troubleshooting guide in the manual to decode these signals and address the root cause of the issue effectively.
6.2 Resetting the System
Resetting the Power Gear Leveling System is a straightforward process that can resolve various operational issues. To reset, press and hold the up, down, right, and left buttons on the control panel simultaneously for a few seconds. This action will reset the system to its default settings, ensuring it is ready for proper operation. If the system malfunctions, resetting it can often restore functionality. After resetting, test the system to ensure it operates correctly.

Maintenance and Care
Regularly check hydraulic fluid levels, inspect hoses for leaks, and lubricate moving parts. Clean the control panel and ensure all components are free from debris for optimal performance.
7.1 Regular Maintenance Tips
Inspect hydraulic lines and connections for leaks regularly. Lubricate moving parts such as jacks and hinges to ensure smooth operation. Clean the control panel and touch pad to prevent debris interference. Always ensure the system is on level ground before performing maintenance. Refer to the manual for detailed procedures. Check hydraulic fluid levels and top up as needed, using the recommended grade. Avoid contamination of hydraulic fluid to maintain system efficiency. Regular maintenance ensures optimal performance and extends the lifespan of your Power Gear Leveling System.
7.2 Hydraulic Fluid and Pump Care
Regularly check hydraulic fluid levels and top up as needed using the recommended grade. Inspect the reservoir for contamination and clean it if necessary. Avoid overfilling, as this can damage the pump. Inspect the pump for wear or damage and replace seals or components promptly. Keep the pump clean and free of debris. Refer to the manual for specific guidelines to ensure optimal performance and longevity of the hydraulic system.
Technical Support and Resources
Access manuals, guides, and technical documents for your Power Gear system. Contact support for assistance. Visit the official website for updated resources and troubleshooting tips.
8.1 Accessing Manuals and Guides
Power Gear leveling system manuals and guides are available online. Visit the official Power Gear website or authorized distributors like RV Parts Express. Download the Electro-Hydraulic Leveling Owner’s Manual or the PowerLevel Series Operation Guide for detailed instructions. Additional resources include troubleshooting guides and technical service manuals. Ensure you have the correct model number for accurate information. For the latest updates, register your product or contact support directly through their official channels.
8.2 Contacting Power Gear Support
For assistance with your Power Gear Leveling System, visit the official Power Gear website or contact their support team directly. Use the contact form on their site or call their support hotline at 1-800-289-3775. You can also email them at support@powergearus.com. Support is available for troubleshooting, part replacements, and general inquiries. Ensure you have your system’s model number ready for efficient assistance. For the most current contact information, always refer to the official Power Gear website.
Congratulations on completing the Power Gear Leveling System Manual. This guide has provided essential information to ensure safe, effective, and optimal use of your system. By following the instructions, troubleshooting tips, and maintenance recommendations, you’ll enjoy enhanced stability and performance. Remember to always adhere to safety guidelines and reach out to Power Gear support for any further assistance. Happy RVing!