Delta Shower Door Installation: A Comprehensive Guide
Embark on a seamless bathroom upgrade! This guide provides detailed Delta shower door installation instructions, referencing available PDF manuals and video tutorials for a flawless result.
Understanding Delta Shower Door Types
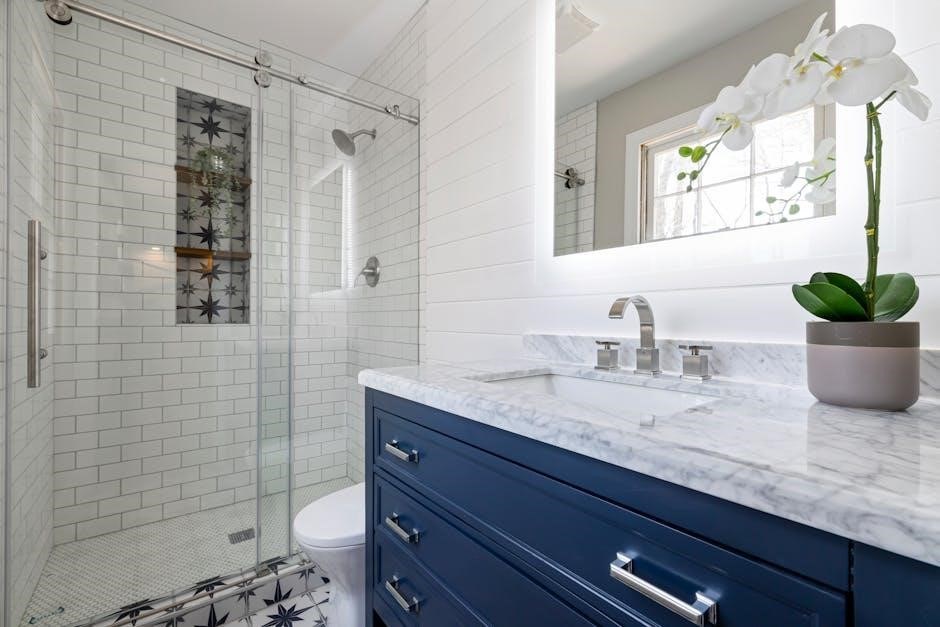
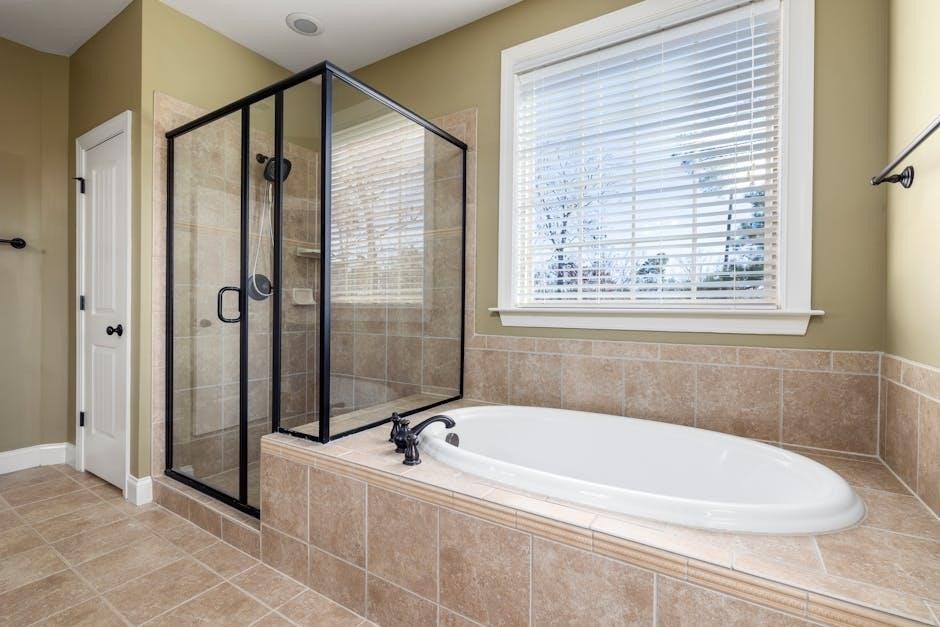
Delta offers a diverse range of shower door solutions, each with unique installation considerations. Understanding these differences is crucial before beginning your project. Delta shower doors primarily fall into three categories: Framed, Semi-Framed, and Frameless. All utilize 1/4 (6mm) or 3/8 (10mm) tempered glass panels for safety and durability.
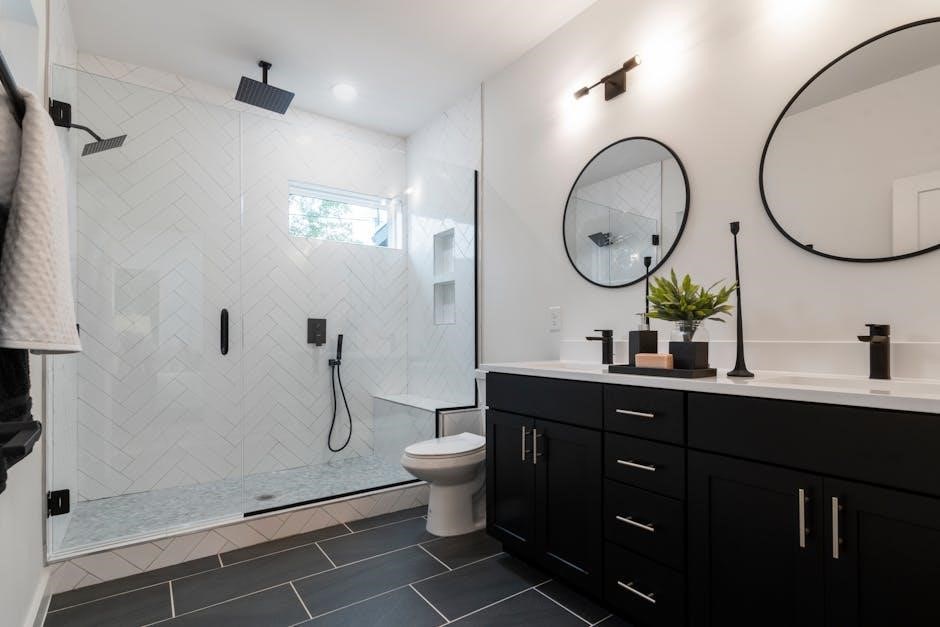
Framed doors feature a complete perimeter frame, offering stability and a traditional aesthetic. Semi-Framed doors have a frame on some sides, balancing support and a more modern look. Frameless doors, as the name suggests, minimize framing, creating a sleek, open feel.
Specific models, like the Delta Contemporary Sliding Shower/Bathtub Doors (April 2020 version) and Delta Frameless Sliding Traditional Style Doors, have distinct installation procedures detailed in their respective PDF installation manuals. Always consult the manual specific to your model for accurate guidance.
Framed vs. Semi-Framed vs. Frameless Doors
Choosing the right Delta shower door style impacts installation complexity. Framed doors, with their full perimeter support, generally offer the most forgiving installation process, ideal for DIYers. Semi-Framed doors require more precision, as some areas rely on glass-to-glass connections.
Frameless doors demand the highest level of accuracy. Proper wall alignment and precise measurements are critical for a secure and watertight seal. The Delta Frameless Sliding Traditional Style doors, for example, require meticulous attention to detail, as outlined in their PDF installation manual.
Regardless of the style, always refer to the specific Delta shower door installation instructions PDF for your model. These manuals detail the unique requirements for each door type, ensuring a successful and lasting installation. Understanding these differences will streamline your project.
Glass Thickness Options (6mm & 10mm)
Delta shower doors offer glass thickness choices: 6mm (1/4 inch) and 10mm (3/8 inch). The PDF installation manuals clearly specify the appropriate handling and installation techniques for each thickness. 6mm glass, commonly found in the Delta Contemporary Sliding Shower/Bathtub Doors (April 2020 Version), is lighter and easier to maneuver during installation.
10mm glass provides a more substantial, luxurious feel, but requires greater care due to its weight. The installation process, detailed in your model’s Delta shower door installation instructions PDF, will emphasize secure bracing and proper support.
Always consult the manual to understand specific weight limitations and recommended lifting techniques. Ignoring these guidelines could lead to damage or injury. Proper glass handling is paramount for a safe and successful installation.

Pre-Installation Preparation
Thorough preparation is key! Review the Delta shower door installation instructions PDF, gather necessary tools, and meticulously inspect all carton parts before beginning.
Required Tools for Installation
Ensuring a smooth installation process begins with having the correct tools readily available. The Delta shower door installation instructions PDF outlines several essential items. You’ll need a level – crucial for plumb and square installations – and a measuring tape for accurate dimensions.
A drill with appropriate drill bits is necessary for mounting studs, alongside a screwdriver (both Phillips and flathead) to tighten screws securely. A caulk gun is vital for applying sealant, preventing water leakage. Safety glasses are paramount to protect your eyes from debris.
Furthermore, consider having a utility knife for opening packaging and trimming materials, and a rubber mallet for gently tapping components into place. A pencil is useful for marking measurements, and a clean rag will help keep surfaces clean during installation. Having these tools prepared beforehand will streamline the entire process, as detailed in the Delta documentation.
Carton Parts Identification
Before commencing installation, meticulously verify all components against the parts list within the Delta shower door installation instructions PDF. This crucial step prevents delays and ensures a complete installation. The documentation details each part, from the glass panels and jambs to the rollers, seals, and mounting hardware.
Carefully unpack all cartons and lay out the parts, comparing them to the diagrams in the manual. Pay close attention to identifying the fixed panels, the sliding door(s), and the top and bottom tracks. Smaller components like screws, washers, and the water diverter seal should also be accounted for.
Delta emphasizes accurate identification; discrepancies should be addressed immediately by contacting customer care at 1.800.964.4850. A thorough parts check, as outlined in the PDF, is the foundation for a successful installation.
Checking for Mis-Cuts & Contacting Customer Care
The Delta shower door installation instructions PDF stresses the importance of inspecting all glass panels and components for potential mis-cuts before beginning installation. Carefully measure each piece against the specified dimensions in the manual. Minor discrepancies – less than 1/4 inch – can often be addressed with caulk to seal any resulting gaps.
However, significant mis-cuts exceeding 1/4 inch are unacceptable and necessitate contacting Delta Customer Care immediately at 1.800.964.4850. Attempting to install miscut components can compromise the door’s functionality and structural integrity.
Delta’s support team will facilitate the prompt shipment of replacement parts, ensuring a correct and hassle-free installation. Referencing your order details and the specific part number from the PDF will expedite the process.

Installation Steps: General Overview
Follow the Delta shower door installation instructions PDF for proper clearances, stud positioning, and secure fixed panel/jamb installation, ensuring a watertight seal.
Clearance Requirements (Widths)
Precise measurements are crucial for a successful Delta shower door installation, as detailed in the installation instructions PDF. Delta recommends a clearance of 1 to 10 inches for optimal functionality and aesthetic appeal. Widths typically range from 1 to 14 inches, depending on the specific model and configuration.
Carefully review your model’s PDF guide to confirm the exact width requirements before beginning installation. Insufficient clearance can lead to operational issues, while excessive space may compromise the door’s stability and water-tightness.
Accurate measurements prevent future problems. Always double-check dimensions against the Delta installation instructions PDF and the physical space available in your bathroom. Minor adjustments may be necessary, but significant discrepancies require contacting Delta Customer Care at 1.800.964.4850 for guidance and potential component replacements.
Mounting Stud Positioning
Proper mounting stud positioning is vital for a secure and lasting Delta shower door installation, as thoroughly explained in the installation instructions PDF. The PDF guide details that mounting stud placement should be carefully considered, typically around the 10-inch mark during the installation process.
Accurate stud positioning ensures the door’s stability and prevents potential issues like wobbling or leaks. Refer to the Delta installation instructions PDF for specific recommendations based on your shower door model.
Incorrect placement can compromise the entire installation. Always use a stud finder to locate wall studs and verify their alignment with the PDF’s guidelines. If you encounter difficulties, consult the Delta installation instructions PDF or contact Delta Customer Care at 1.800;964.4850 for expert assistance.
Installing Fixed Panels and Jambs
The Delta installation instructions PDF emphasizes meticulous attention during fixed panel and jamb installation. This stage, typically covered on pages 10-14 of the PDF, requires precise alignment and secure fastening to ensure a watertight seal and structural integrity.
Begin by carefully positioning the jambs, utilizing the previously determined mounting stud locations. The PDF illustrates proper techniques for applying sealant to prevent water penetration.
Next, install the fixed panels, ensuring they are plumb and square. The Delta installation instructions PDF provides detailed diagrams and torque specifications for all fasteners. Double-check all connections before proceeding. If issues arise, revisit the PDF or contact Delta Customer Care at 1.800.964.4850 for support.
Detailed Installation Guide: 48″ Shower Door System
Follow the Delta installation instructions PDF for a 48″ system! Page 15 details a step-by-step process, ensuring a secure and watertight installation.
Step-by-Step Installation Process
Initiate the installation by carefully reviewing the Delta installation instructions PDF. Begin with mounting stud positioning (page 10), ensuring accurate placement for stability. Next, install fixed panels and jambs (pages 10-14), verifying plumb and square alignment.
Proceed to the 48″ shower door system’s specific steps (page 15), paying close attention to hardware sequencing. The PDF guide illustrates water diverter seal installation (page 18), crucial for preventing leaks. Subsequently, secure the top track, referencing detailed diagrams for proper alignment.
Throughout the process, double-check all connections and measurements against the PDF. Address any minor mis-cuts (less than 1/4″) with caulk, while significant mis-cuts require contacting Delta Customer Care at 1.800.964.4850 for replacement components. A successful installation hinges on meticulous adherence to the provided Delta guide.
Water Diverter Seal Installation
Crucially, the Delta installation instructions PDF details the water diverter seal’s precise placement. This component, vital for leak prevention, requires careful attention during installation. The PDF guide (page 18, step 17) illustrates the correct orientation and seating of the seal within the designated track.
Ensure the track is clean and free of debris before applying the seal. Gently press the seal into place, verifying a complete and uniform contact along its entire length. Improper installation can lead to water escaping the shower enclosure, so meticulousness is paramount.
Refer to the Delta documentation for specific seal types and any accompanying adhesive recommendations. A properly installed water diverter seal, as outlined in the PDF, guarantees a watertight shower experience and protects your bathroom from water damage.
Top Track Installation
The Delta installation instructions PDF provides a visual guide to secure top track installation. This step, critical for shower door stability, demands precision and adherence to the manufacturer’s specifications. The PDF details the correct fastener type and placement intervals for optimal support.
Before securing the track, ensure it’s level and properly aligned with the fixed panels. Use a level to verify accuracy, adjusting as needed. The Delta documentation emphasizes pre-drilling pilot holes to prevent glass stress and potential cracking.
Carefully tighten the fasteners, avoiding over-tightening which could damage the track or surrounding wall surfaces. Refer to the PDF for torque recommendations. A correctly installed top track, as shown in the Delta guide, ensures smooth door operation and long-lasting durability.
Troubleshooting Common Issues
Refer to the Delta installation instructions PDF for solutions! Minor mis-cuts under 1/4″ can be caulked, while larger issues require contacting Delta Care at 1.800.964.4850.
Addressing Minor Mis-Cuts (Less than 1/4″)
Encountering a slight discrepancy during installation is common. If your Delta shower door installation instructions PDF reveals a mis-cut less than 1/4 inch, don’t worry – a simple fix is readily available! This minor imperfection is easily addressed with the application of a high-quality, waterproof caulk.
Carefully apply the caulk to the gap created by the mis-cut, ensuring a clean and even bead. This will effectively seal the space, preventing water leakage and maintaining the structural integrity of your shower door. Remember to choose a caulk color that complements your shower enclosure for a seamless aesthetic.

Thoroughly review the Delta installation instructions PDF for specific caulk recommendations and application techniques. Following these guidelines will guarantee a professional-looking and long-lasting repair, allowing you to enjoy your newly installed Delta shower door without concerns.
Dealing with Significant Mis-Cuts (More than 1/4″)
If your Delta shower door installation instructions PDF indicates a mis-cut exceeding 1/4 inch, attempting a repair with caulk is not recommended. A gap of this size compromises the door’s integrity and could lead to significant water damage and safety concerns.
Do not proceed with the installation. Instead, immediately contact Delta Customer Care at 1.800.964.4850. Their dedicated team is equipped to assist you in obtaining the necessary replacement components to complete the installation correctly.
Delta is committed to ensuring a successful installation experience. They will work with you to identify the affected part and arrange for a swift replacement, referencing your specific model and the Delta installation instructions PDF. Attempting to modify or force-fit miscut pieces can void your warranty, so professional assistance is crucial.
Specific Model Considerations
Consult your Delta shower door installation instructions PDF for model-specific guidance. Variations exist, particularly for Contemporary Sliding (April 2020) and Frameless Traditional Style doors.
Delta Contemporary Sliding Shower/Bathtub Doors (April 2020 Version)
Specifically for the April 2020 release, accessing the correct Delta shower door installation instructions PDF is crucial. This version requires careful attention to the water diverter seal installation, detailed on page 18, step 17 of the manual.
Ensure you’re working with the correct documentation; verify the date on your existing installation guide. This model is exclusively designed for use with these Contemporary Sliding doors. The PDF will guide you through mounting stud positioning, fixed panel installation, and top track alignment.
Pay close attention to clearance requirements (pages 1-10) and carton parts identification (page 5) to avoid complications. The PDF provides a step-by-step process, ensuring a secure and watertight installation. Remember to reference the video tutorial for visual assistance alongside the written instructions.
Delta Frameless Sliding Traditional Style Doors
For the Delta Frameless Sliding Traditional Style Doors, a comprehensive installation instructions PDF is readily available for download. This guide details the installation of the 1/4 inch (6mm) glass panels, emphasizing precise alignment for a truly frameless aesthetic.
The PDF manual covers everything from required tools and parts identification to step-by-step instructions, ensuring a smooth installation process. Pay particular attention to the mounting stud positioning and the installation of fixed panels and jambs.
Troubleshooting sections address potential mis-cuts, offering solutions for gaps less than 1/4 inch (caulk application) and guidance for contacting customer care (1.800.964.4850) for larger discrepancies. Utilize the PDF alongside the available video tutorial for optimal results.

Resources & Support
Need assistance? Access the full Delta shower door installation instructions PDF online, or contact Delta Customer Care at 1.800.964.4850 for expert help!
Accessing the Full Installation Manual (PDF)
Locating your Delta shower door’s comprehensive installation manual in PDF format is straightforward! These manuals are invaluable resources, offering detailed diagrams, step-by-step instructions, and crucial safety information to ensure a successful installation.
Delta provides readily accessible PDF versions of their installation guides directly through various online channels. A quick search on the Delta Faucet website, using your specific model number, will typically lead you to the correct document.
Remember to verify the version of your shower door – particularly for models like the Contemporary Sliding Shower/Bathtub Doors (April 2020 version) – as instructions can vary. The PDF will cover everything from carton parts identification to troubleshooting common issues, including addressing minor mis-cuts and proper water diverter seal installation. Having this PDF readily available throughout the installation process is highly recommended for a smooth and efficient experience.
Delta Customer Care Contact Information (1.800.964.4850)
Encountering challenges during your Delta shower door installation? Don’t hesitate to reach out to Delta’s dedicated Customer Care team for expert assistance! They are equipped to guide you through the process, clarify any ambiguities in the PDF installation instructions, and resolve potential issues.
You can connect with Delta Customer Care by calling 1.800.964.4850. Their representatives can provide support regarding mis-cut components – whether a gap is less than 1/4 inch (suggesting caulk) or exceeds that threshold (requiring replacement parts).
Be prepared to provide your model number and details about the specific step where you’re experiencing difficulty. Delta’s team is committed to ensuring a positive installation experience, offering solutions and facilitating the acquisition of necessary replacement components to complete your project successfully, referencing the PDF guide as needed.
Delta Mod Shower Door System Installation Video Tutorial
Visual learners rejoice! Delta offers a comprehensive video tutorial designed to complement the PDF installation instructions for the Delta Mod Shower Door System. This resource provides a step-by-step demonstration of the entire installation process, making it easier to understand and follow along.
The video breaks down complex steps into manageable segments, showcasing proper techniques for installing fixed panels, jambs, and the top track. It visually clarifies the water diverter seal installation, a crucial aspect of preventing leaks.
Accessing this tutorial alongside your PDF guide ensures a thorough understanding of each stage. It’s an invaluable tool for DIY enthusiasts and anyone seeking a clear, visual representation of the installation procedure, ultimately leading to a professional and watertight finish.